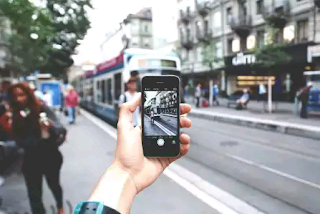
Before the advent of smartphones, taking pictures was laborious. You would either have to head for the photo studio or buy a camera and download some editing application on your computer.
But not anymore, we now have phones with which we can take nice pictures instantly and even edit them easily ourselves!
However, pointing your phone and clicking shoot is not the same as taking a great photo. Many bad photos we see out there are from phones not professional cameras!
You should know that there are secrets to taking a great photograph with your phone. Luckily for you, I know a bit and I'm going to be sharing them with you.
Check them out and practice them to level up your phone photography skills!
This is a simple one.
Phones cameras have no protection against dust, lint and fingerprint smudges. When there is a build-up of these junk on your lens, your photos may look cloudy or hazy and mind you, no amount of editing can fix this.
Clean your lens with a soft lintless cloth and you're good to go!
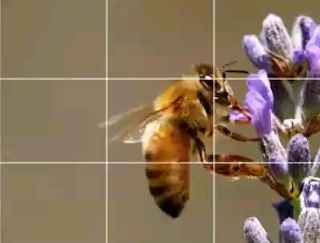
One of the best and easiest ways to take good pictures is to use gridlines. Gridlines divide your photo into 9 small squares and help you implement the "rule of thirds" -a photographic composition principle that
says an image should be broken down into thirds,
both horizontally and vertically, so you have nine
parts in total.
According to this rule, if you place points of interest
in these intersections or along the lines, your photo
will be more balanced, level, and allow viewers to
interact with it more naturally.
To turn on the grid
There's something you should know. Even though the 'rule of thirds' is called a rule, it's more of a guideline and you don't actually have to follow it everytime. But if you're a rookie photographer, I recommend sticking to the rule if you really want to take great pictures.
Taking pictures from different or weird angles makes them more memorable, unique and beautiful. You can come up with any angle you desire, all you have to do is to be creative. Consider taking your pictures from these angles.
Try out as many angles as you can imagine, your creativity is your only limit. In fact, a journalist got popular because he gets behind someone giving a speech to capture
the faces of the audience.
What's your wierd angle for a shot? Let me know in the comments.
Negative space can take your pictures from good to great. Negative space refers to areas surrounding the subject of an image.
When you include a lot of negative space, it makes your subject stand out and evokes a strong reaction from whoever is looking at the picture.
What are examples of what a negative space looks like?
A large expanse of open water, sky, an empty field, a park, or a large wall.
Looking at the reflection of the sky in a pool of water is so picturesque. Why?
The reason is why we love mirrors, it is because the human eye is drawn to reflections. Reflections will make your pictures idyllic... Add them!
Sources of reflections include puddles, larger bodies of water, mirrors,
sunglasses, drinking glasses, and metallic surfaces just to mention a few.
When you want to take a photo from a distance, it is tempting to zoom in on the specific detail you want to capture, right? Don't!
Once you do, the picture looks blurry, grainy, pixelated and coarse.
Instead just move a few steps closer to your subject (you should keep your distance if it's a wild animal) or take the photo from distance and crop it later on. This way, you'll retain quality.
Many great photos focus on just one subject. Some professional photographers even say that the subject should not fill up the entire frame and that two-thirds of the photo should be negative space.
This will allow the subject to stand out the more and appeal interest from anyone looking at it.
Also, ensure that you that you tap the screen of your phone to focus the camera on your subject.
To be honest, it is difficult to find a great photo taken with a phone flash. The bulb sits too close to the lens and can cause an overwhelming glare. Furthermore, the flash can produce unwanted results like glowing eyes or overly-lit skin.
Of course, there are situations where the flash is needed, but for most part, phone photographers should take advantage of natural light they can find, even in the dark.
That gives you a chance to play with shadows or to create a silhouette with ambient sources of light like street lights and surrounding buildings.
But not anymore, we now have phones with which we can take nice pictures instantly and even edit them easily ourselves!
However, pointing your phone and clicking shoot is not the same as taking a great photo. Many bad photos we see out there are from phones not professional cameras!
You should know that there are secrets to taking a great photograph with your phone. Luckily for you, I know a bit and I'm going to be sharing them with you.
Check them out and practice them to level up your phone photography skills!
1. Keep the lens clean
This is a simple one.
Phones cameras have no protection against dust, lint and fingerprint smudges. When there is a build-up of these junk on your lens, your photos may look cloudy or hazy and mind you, no amount of editing can fix this.
Clean your lens with a soft lintless cloth and you're good to go!
2. Use gridlines
One of the best and easiest ways to take good pictures is to use gridlines. Gridlines divide your photo into 9 small squares and help you implement the "rule of thirds" -a photographic composition principle that
says an image should be broken down into thirds,
both horizontally and vertically, so you have nine
parts in total.
According to this rule, if you place points of interest
in these intersections or along the lines, your photo
will be more balanced, level, and allow viewers to
interact with it more naturally.
To turn on the grid
- IPhone: Go to 'Settings', choose 'Photos & Cameras', and switch 'Grid' on
- Samsung Galaxy: Launch 'Camera', go to 'Settings', scroll down and switch the 'Grid lines' option to 'On'
- Other Android: Launch 'Camera', go to 'Settings', find 'Gridlines' or 'Guidelines' and switch it 'On'
There's something you should know. Even though the 'rule of thirds' is called a rule, it's more of a guideline and you don't actually have to follow it everytime. But if you're a rookie photographer, I recommend sticking to the rule if you really want to take great pictures.
3. Take your photos from different or weird angles
Taking pictures from different or weird angles makes them more memorable, unique and beautiful. You can come up with any angle you desire, all you have to do is to be creative. Consider taking your pictures from these angles.
- The overhead view or bird's view- You need to position yourself above than the subject. Try taking pictures of the subject from rooftops, tables or even ladders(but be careful so you don't fall)
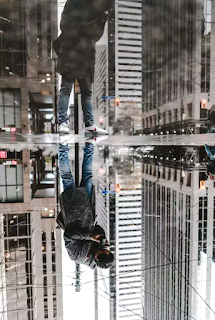
- The reverse bird view: To take this type of shot, you need to be below the subject.
- What about the perspective of a child? - You'll need to crouch or lie on the ground to capture this shot.
Try out as many angles as you can imagine, your creativity is your only limit. In fact, a journalist got popular because he gets behind someone giving a speech to capture
the faces of the audience.
What's your wierd angle for a shot? Let me know in the comments.
4. Include negative space
Negative space can take your pictures from good to great. Negative space refers to areas surrounding the subject of an image.
When you include a lot of negative space, it makes your subject stand out and evokes a strong reaction from whoever is looking at the picture.
What are examples of what a negative space looks like?
A large expanse of open water, sky, an empty field, a park, or a large wall.
5. Employ reflections
Looking at the reflection of the sky in a pool of water is so picturesque. Why?
The reason is why we love mirrors, it is because the human eye is drawn to reflections. Reflections will make your pictures idyllic... Add them!
Sources of reflections include puddles, larger bodies of water, mirrors,
sunglasses, drinking glasses, and metallic surfaces just to mention a few.
6. Avoid zooming in
When you want to take a photo from a distance, it is tempting to zoom in on the specific detail you want to capture, right? Don't!
Once you do, the picture looks blurry, grainy, pixelated and coarse.
Instead just move a few steps closer to your subject (you should keep your distance if it's a wild animal) or take the photo from distance and crop it later on. This way, you'll retain quality.
7. Focus on one subject
Many great photos focus on just one subject. Some professional photographers even say that the subject should not fill up the entire frame and that two-thirds of the photo should be negative space.
This will allow the subject to stand out the more and appeal interest from anyone looking at it.
Also, ensure that you that you tap the screen of your phone to focus the camera on your subject.
8. Use natural light
To be honest, it is difficult to find a great photo taken with a phone flash. The bulb sits too close to the lens and can cause an overwhelming glare. Furthermore, the flash can produce unwanted results like glowing eyes or overly-lit skin.
Of course, there are situations where the flash is needed, but for most part, phone photographers should take advantage of natural light they can find, even in the dark.
That gives you a chance to play with shadows or to create a silhouette with ambient sources of light like street lights and surrounding buildings.


Post a Comment
Share your thoughts here!